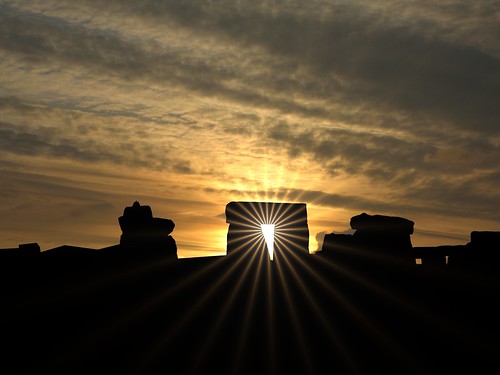
From Time to Time i find a photo that i just have to post that is not my work. I get permission from the photographer and then post to my blog. This is one such photo. Please enjoy!
Stonehenge is a prehistoric monument located in the English county of Wiltshire, about 3.2 kilometres (2.0 mi) west of Amesbury and 13 kilometres (8.1 mi) north of Salisbury.
One of the most famous prehistoric sites in the world, Stonehenge is composed of earthworks surrounding a circular setting of large standing stones. Archaeologists had believed that the iconic stone monument was erected around 2500 BC, although this has since been advanced to 2400-2200 BC.
The surrounding circular earth bank and ditch, which constitute the earliest phase of the monument, have been dated to about 3100 BC. The site and its surroundings were added to the UNESCO's list of World Heritage Sites in 1986 .
New archaeological evidence found by the Stonehenge Riverside Project indicates that Stonehenge served as a burial ground from its earliest beginnings. The dating of cremated remains found that burials took place as early as 3000 B.C, when the first ditches were being built around the monument. Burials continued at Stonehenge for at least another 500 years when the giant stones which mark the landmark were put up.
For a daytime view, please link below :
www.flickr.com/photos/59303791@N00/2917367909/
Uploaded by Heaven`s Gate (John) on 13 Oct 08, 3.43AM CDT.
Thursday, October 23, 2008
Stonehenge Sunset
Wednesday, October 22, 2008
Rays of hope- for a better tommorow
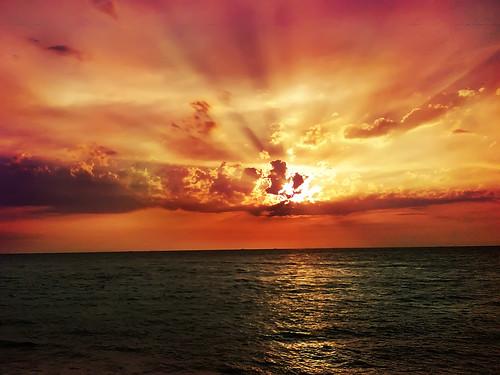
I saw this photo while posting to one of the groups on Flickr that i belong to. I thought that you might enjoy it as much as i did! Posted by permission as always!
Rays of hope- for a better tommorow
Uploaded by green umbrella on 21 Oct 08, 6.18PM CDT.
Stained Glass: Crop

I did a crop of the photo and this is what i got. Lighted brick on one side and negative space on the other broken with the stained glass window in the middle.
Exposure: 0.077 sec (1/13)
Aperture: f/3.5
Focal Length: 35 mm
ISO Speed: 200

Tuesday, October 21, 2008
Processing RAW Files in Adobe Lightroom
The following tutorial on Processing RAW Files using Adobe Lightroom was submitted by John Short from www.canonphoto.co.uk and www.johnshort.co.uk
Why do we read so often then it is best to shoot your image in raw and not as jpegs?
The first image in this tutorial is a jpeg of a Gannet where I have deliberately blown the highlights. One of the problems with a jpeg image is once exposed it is processed in your camera and the raw data is lost. If you have blown the highlights the information is simply not there for you to recover in your favourite processing application.

The following images are the basic steps in processing a raw file and I hope will demonstrate to you the benefits of shooting in raw mode. If you want to try to emulate my final image using the jpeg file and your favourite image editing software be my guest. It will be interesting to see what can be achieved in comparison with working with the raw file.
Adobe Lightroom is not just a processing application for raw files, it is also a library for storing, retrieving and searching for images. I have 20,000 raw files on my computer and Lightroom has catalogued them all in the library for instant display. Images can be filed by title,date metadata and so on. This aspect of Lightroom is really for a different tutorial and if there is interest I will put one together but for today let us concentrate on processing your raw files.
First we must open our raw file in the develop module of Lightroom. This screen capture shows the basic image in Lightroom with the develop module circled in red. The picture of the Gannet is ‘as taken’ and saved as a jpeg for you to see the blown highlights.( if you feel like taking on the challenge feel free to try and process the basic jpeg version of the image.

The first change I always make to an image is to try and correct exposure problems by reducing or increasing the exposure slider. The exposure values are roughly equivalent to f stops and you can either type directly into the box or move the slider with your mouse. In this instance I have reduced the exposure by 1.27, just over 1 f stop.

Now we can adjust the recovery slider.This tool will only effect the highlights and will recover additional detail that may not be visible in the original image.

leave the fill in tool for now and go instead to the Blacks, this darkens the darkest parts of the image without affecting the highlights. It is the opposite of the recovery tool used earlier. Moving the slider only a slight amount will give the appearance of more depth. In this instance I have increased the blacks by 5

The fill tool brings details back into the shadow areas without affecting the highlights. This is a great tool for pulling detail back into the shadow areas and in this example I’ve increased the fill tool by 11.

In the top left corner of Lightroom select 1:1 this will enlarge the image in your viewing screen to full size. the clarity slider increases local contrast making the image appear sharper. This tool needs use with care, it is all too easy to overdo the effect.

The vibrancy control will enable you to increase the depth of colour without the risk of over saturation , I find it a subtle enhancer for colour depth.

All that remains now is to export the image as a tiff to your favourite processing application for the final touches.

In this example I have only shown the basic processing tools available in Lightroom. The objective is to whet your appetite and to illustrate the benefits of working In raw. If you think you can achieve the quality from a jpeg then do try with the gannet.jpg image. You will soon see that the lost highlights are lost forever.
Here’s the first and last image side by side (click to enlarge):

At a later date perhaps it will be worth while looking at some of the more advanced tools such as noise reduction and curves!
DSC09037: Doll
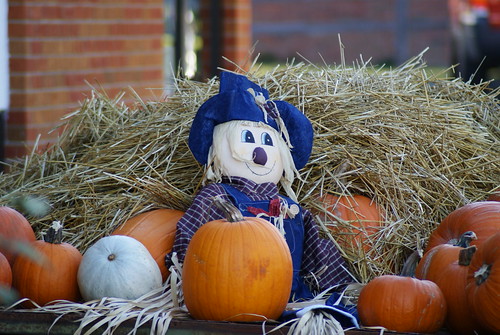
I little guy sitting on the trailer at the church for the pumpkin sale.
Exposure: 0.005 sec (1/200)
Aperture: f/5
Focal Length: 250 mm
ISO Speed: 200
Monday, October 20, 2008
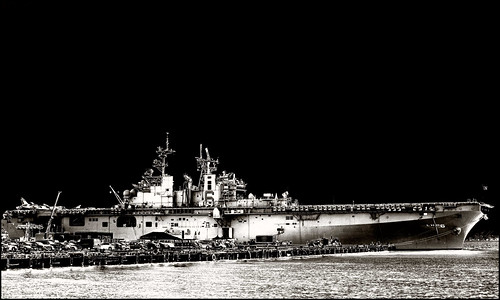
dreadnought
Old P&S Camera Contest!
I have supplied Hyper-links to the photographers work as well.
The contest ran for about 8 days and here were the rules:
Post photos taken with your older P&S Cameras.
+MEDIUM FORMAT+
+Number Photographs+
+Post 4 Lines of EXIF Data+
+Tell What Kind Of Camera Used+
+Tell Where It Was Taken+
Here are the 4 that i have choosen to post on my blog!
1:
manimalmagic has fleas (don't touch)

Kodak P880
1/80s
f/2.8
24mm (in 35mm terms)
ISO50
Taken in Hillegom, the Netherlands, at the mental health facility grounds which I frequent :/
2:
Naomi Frost

FujiFilm FinePix S7000
2secs
f/5
ISO200
R72 filter
tripod and shutter release
3:
L' Moy...ॐ

Camera: Kodak Z812 IS Zoom
Exposure: 0.001 sec (1/1000)
Aperture: f/4
Focal Length: 5.9 mm
Manistee, Michigan... Spring Break 08
4:
manimalmagic has fleas (don't touch)
Kodak P8801/500s
f/4.1
ISO50
140mm (in 35mm terms)
Heemstede, the Netherlands

What is your opinion?
Blogroll Me!
DSC09059: Me = Reflection!
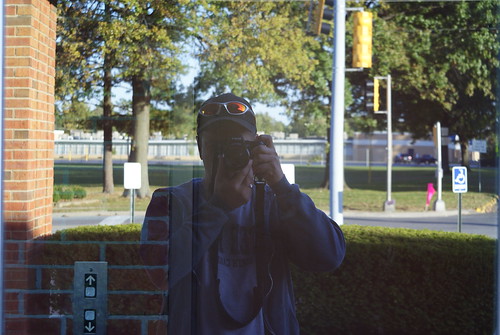
Me taking a reflective photo at the church yesterday evening. A new self portrait if you will!
Exposure: 0.05 sec (1/20)
Aperture: f/8
Focal Length: 55 mm
ISO Speed: 200
Sunday, October 19, 2008
DSC08987: Lines and Angles
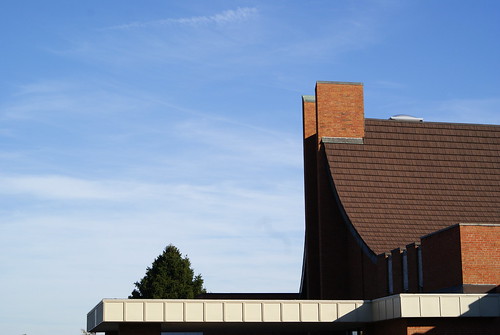
This is a photo of the exterior of the church. My main focus of this photo was the sky and how it is broken up by the angles and lines of the structure of the church. The white low roof line that is through most of the photo and then the main sanctuary and the shingles of the roof and how it sweeps up to the sky. I used a high f/-stop to give a good depth of field to this photo. I love the lone tree that stands above the main entrance to the church. The building was built in 1970.
Exposure: 0.003 sec (1/320)
Aperture: f/10
Focal Length: 50 mm
ISO Speed: 200
DSC09024: Blue Light...
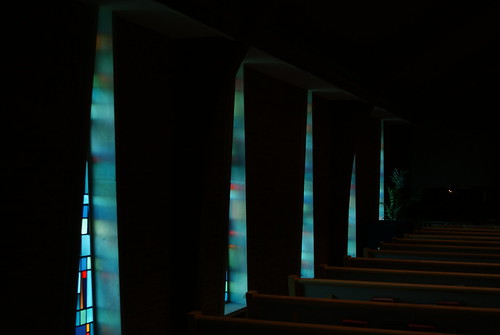
This is perhaps my favorite photo that i took in the church sanctuary today. I was able to be let in to get some photos while i was there helping sell pumpkins. The lighting was all turned off and i placed my camera in BULB mode so i had total control ov it. I love the blue light that is spilling into the dark seating area with just a glimpse of the stained glass that is i the triangular windows.
Exposure: 0.1 sec (1/10)
Aperture: f/3.5
Focal Length: 35 mm
ISO Speed: 200
4 New Tracks!! #Bandcamp
If you want to Purchase any of my music(s), Please go to https://djrenigade.bandcamp.com/

-
DSC00210 , originally uploaded by RMStringer . Phillip Glyn and Ridding High at Solley's Disco Saturday night 1-2-2010. Taken with the S...
-
32 min exploration of deep space using Ableton Live 12 located in RenigadeCineTrax, Beaumont Texas. Recorded live on Twitch during the #Ambi...


